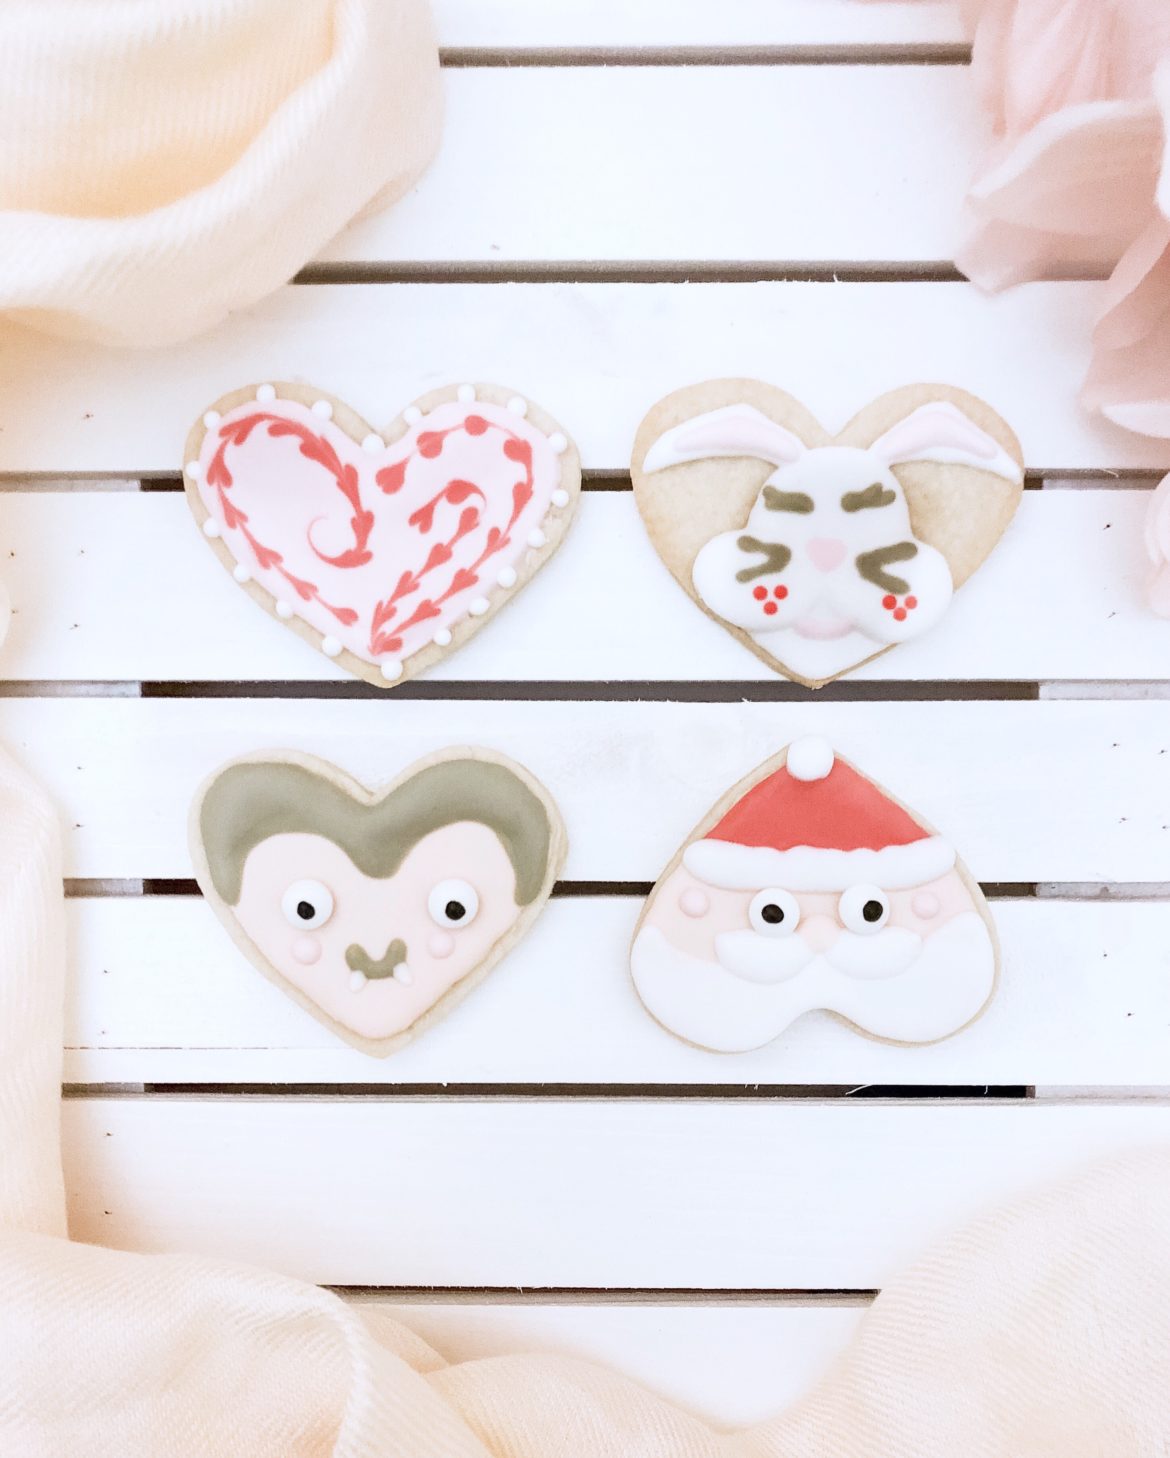
One Cookie Cutter, Four Holidays
I love the joy that comes from the holidays and since Christmas and New Years just passed and Valentine’s is on my mind, I wanted to challenge myself to use a heart cookie cutter to make cookies for other holidays! I used a three inch heart cookie cutter and decorated them into Valentine’s, Easter, Halloween, and Christmas cookies!
This sugar cookie recipe is easy and very user friendly. You don’t even have to refrigerate the dough, which will cut down on the prep time. Here’s how to make it:
Ingredients
2 1/2 cups all purpose flour
1 cup butter, room temp
1 cup granulated sugar
1 egg
2 tsp baking soda
1 1/2 tsp vanilla extract
1/2 tsp salt
Gel Food Colors
Eyeball sprinkles
Directions
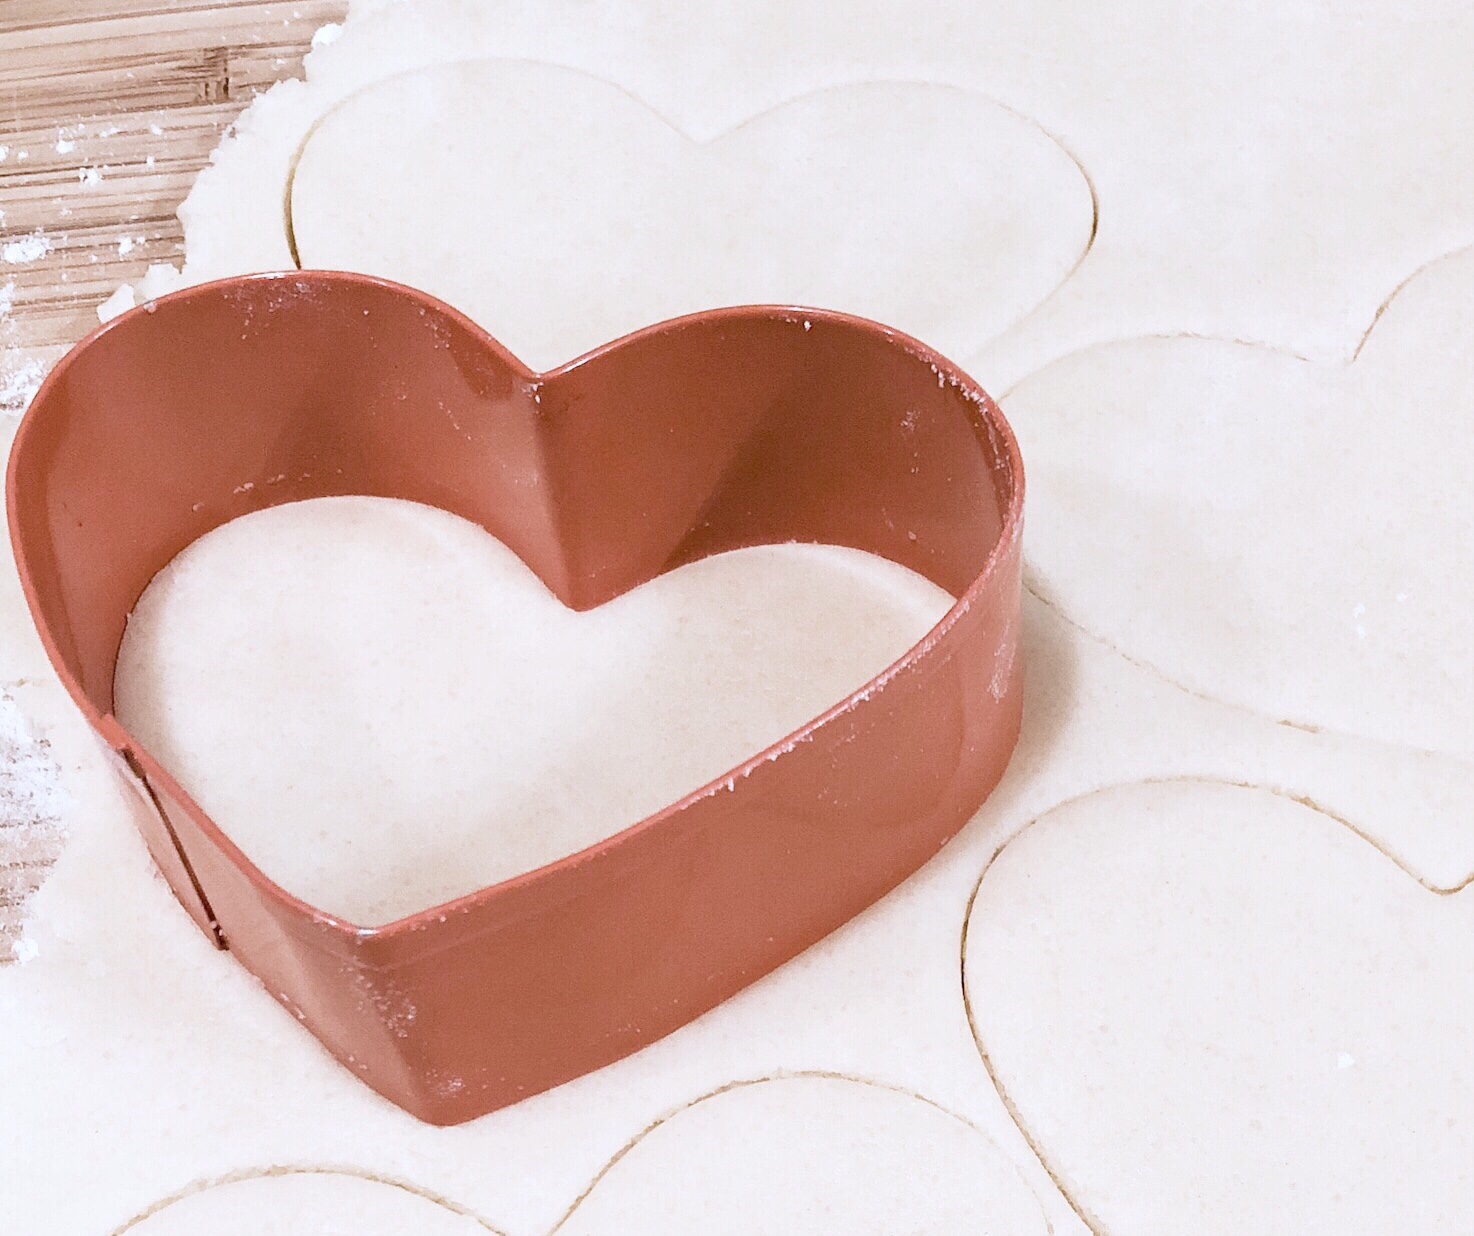
Preheat oven to 350 F. In a mixing bowl, cream the butter and sugar until fluffy. Whisk in the egg and vanilla extract. Add the flour, salt, and baking soda and mix with a spoon. Gather the dough into a ball and roll out on a lightly floured surface. I like to use a large bamboo or wooden cutting board to make cleanup easier. Roll the dough out to 1/4″ in thickness. Dip the heart cookie cutter into flour and cut out hearts.
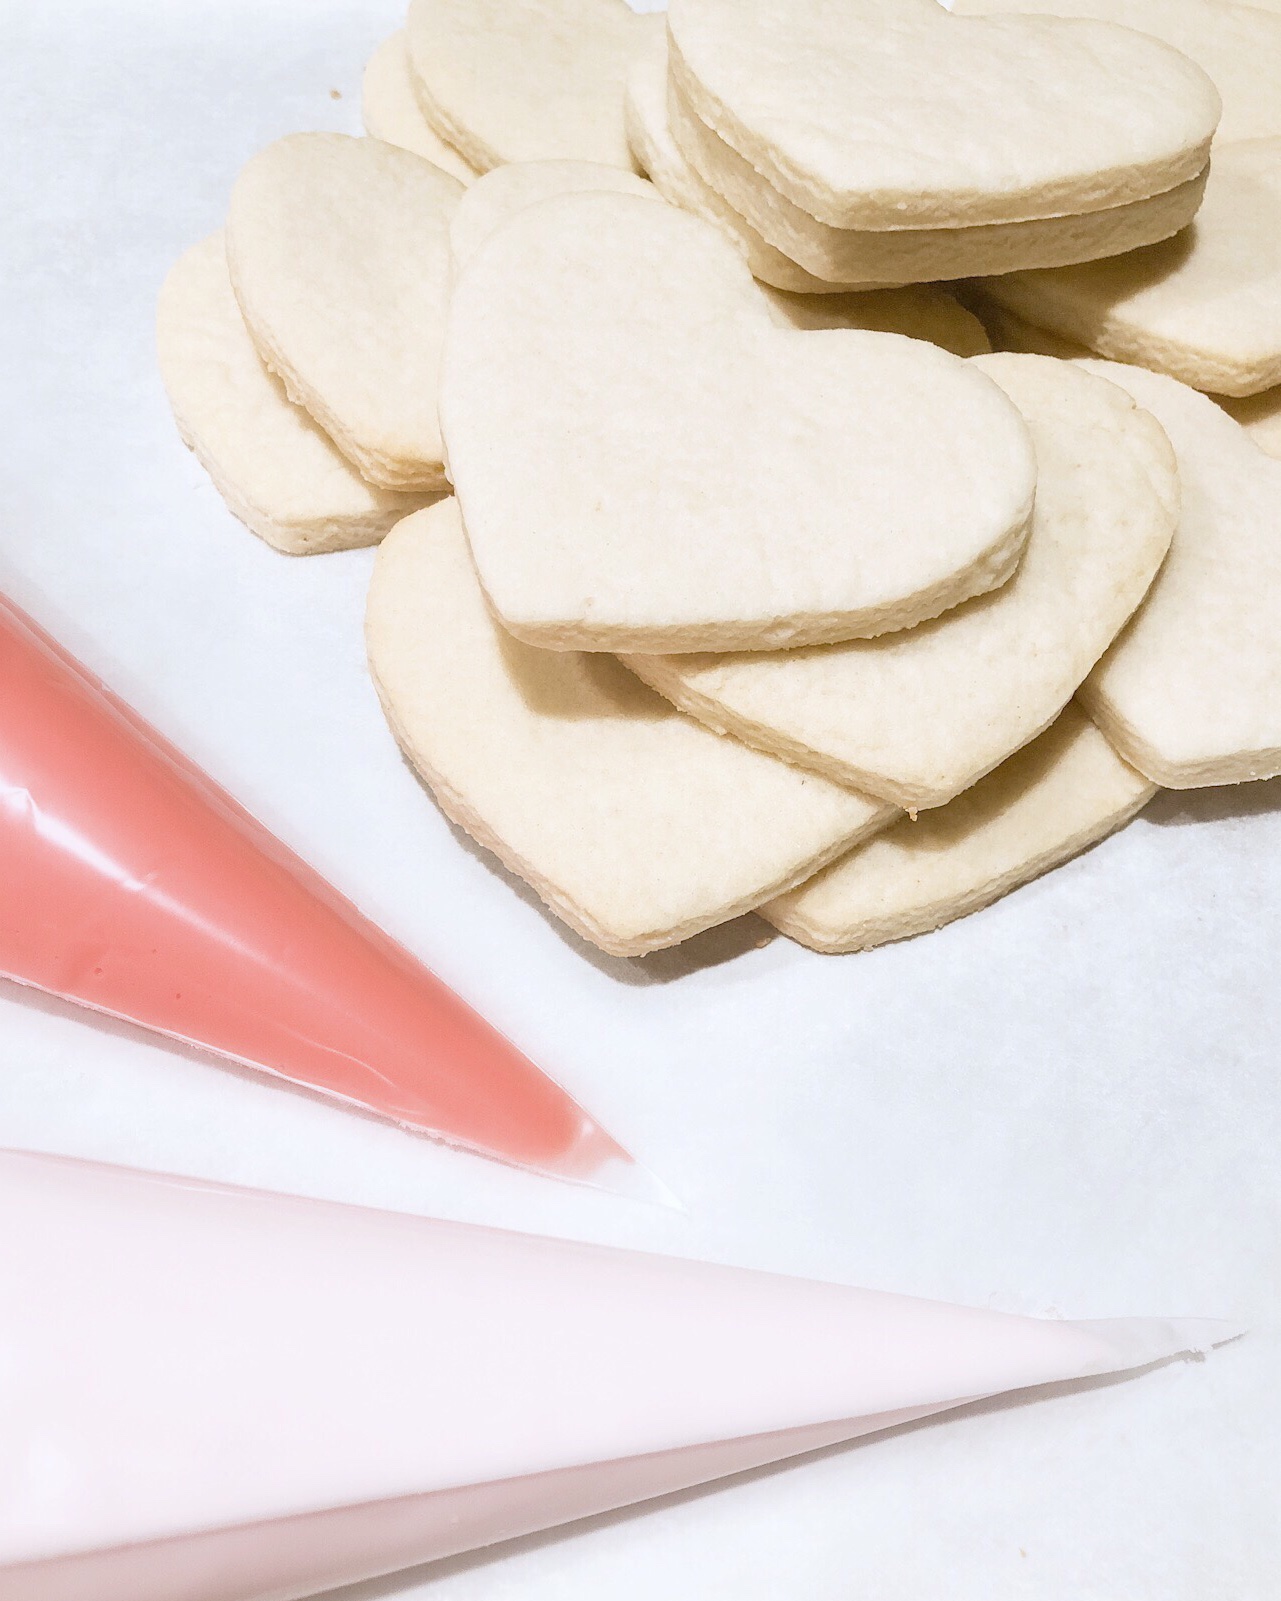
 Place the hearts onto a parchment lined cookie sheet and bake for 7-8 minutes. Cool on a cookie rack. While the cookies are cooling, make the royal icing to decorate.
Set aside some icing and tint the rest light pink, red, tan, and grey.
Once the cookies are cooled you are ready to decorate. I made them into a Valentine’s Day heart, an Easter Bunny, a Halloween vampire, and Santa Claus.
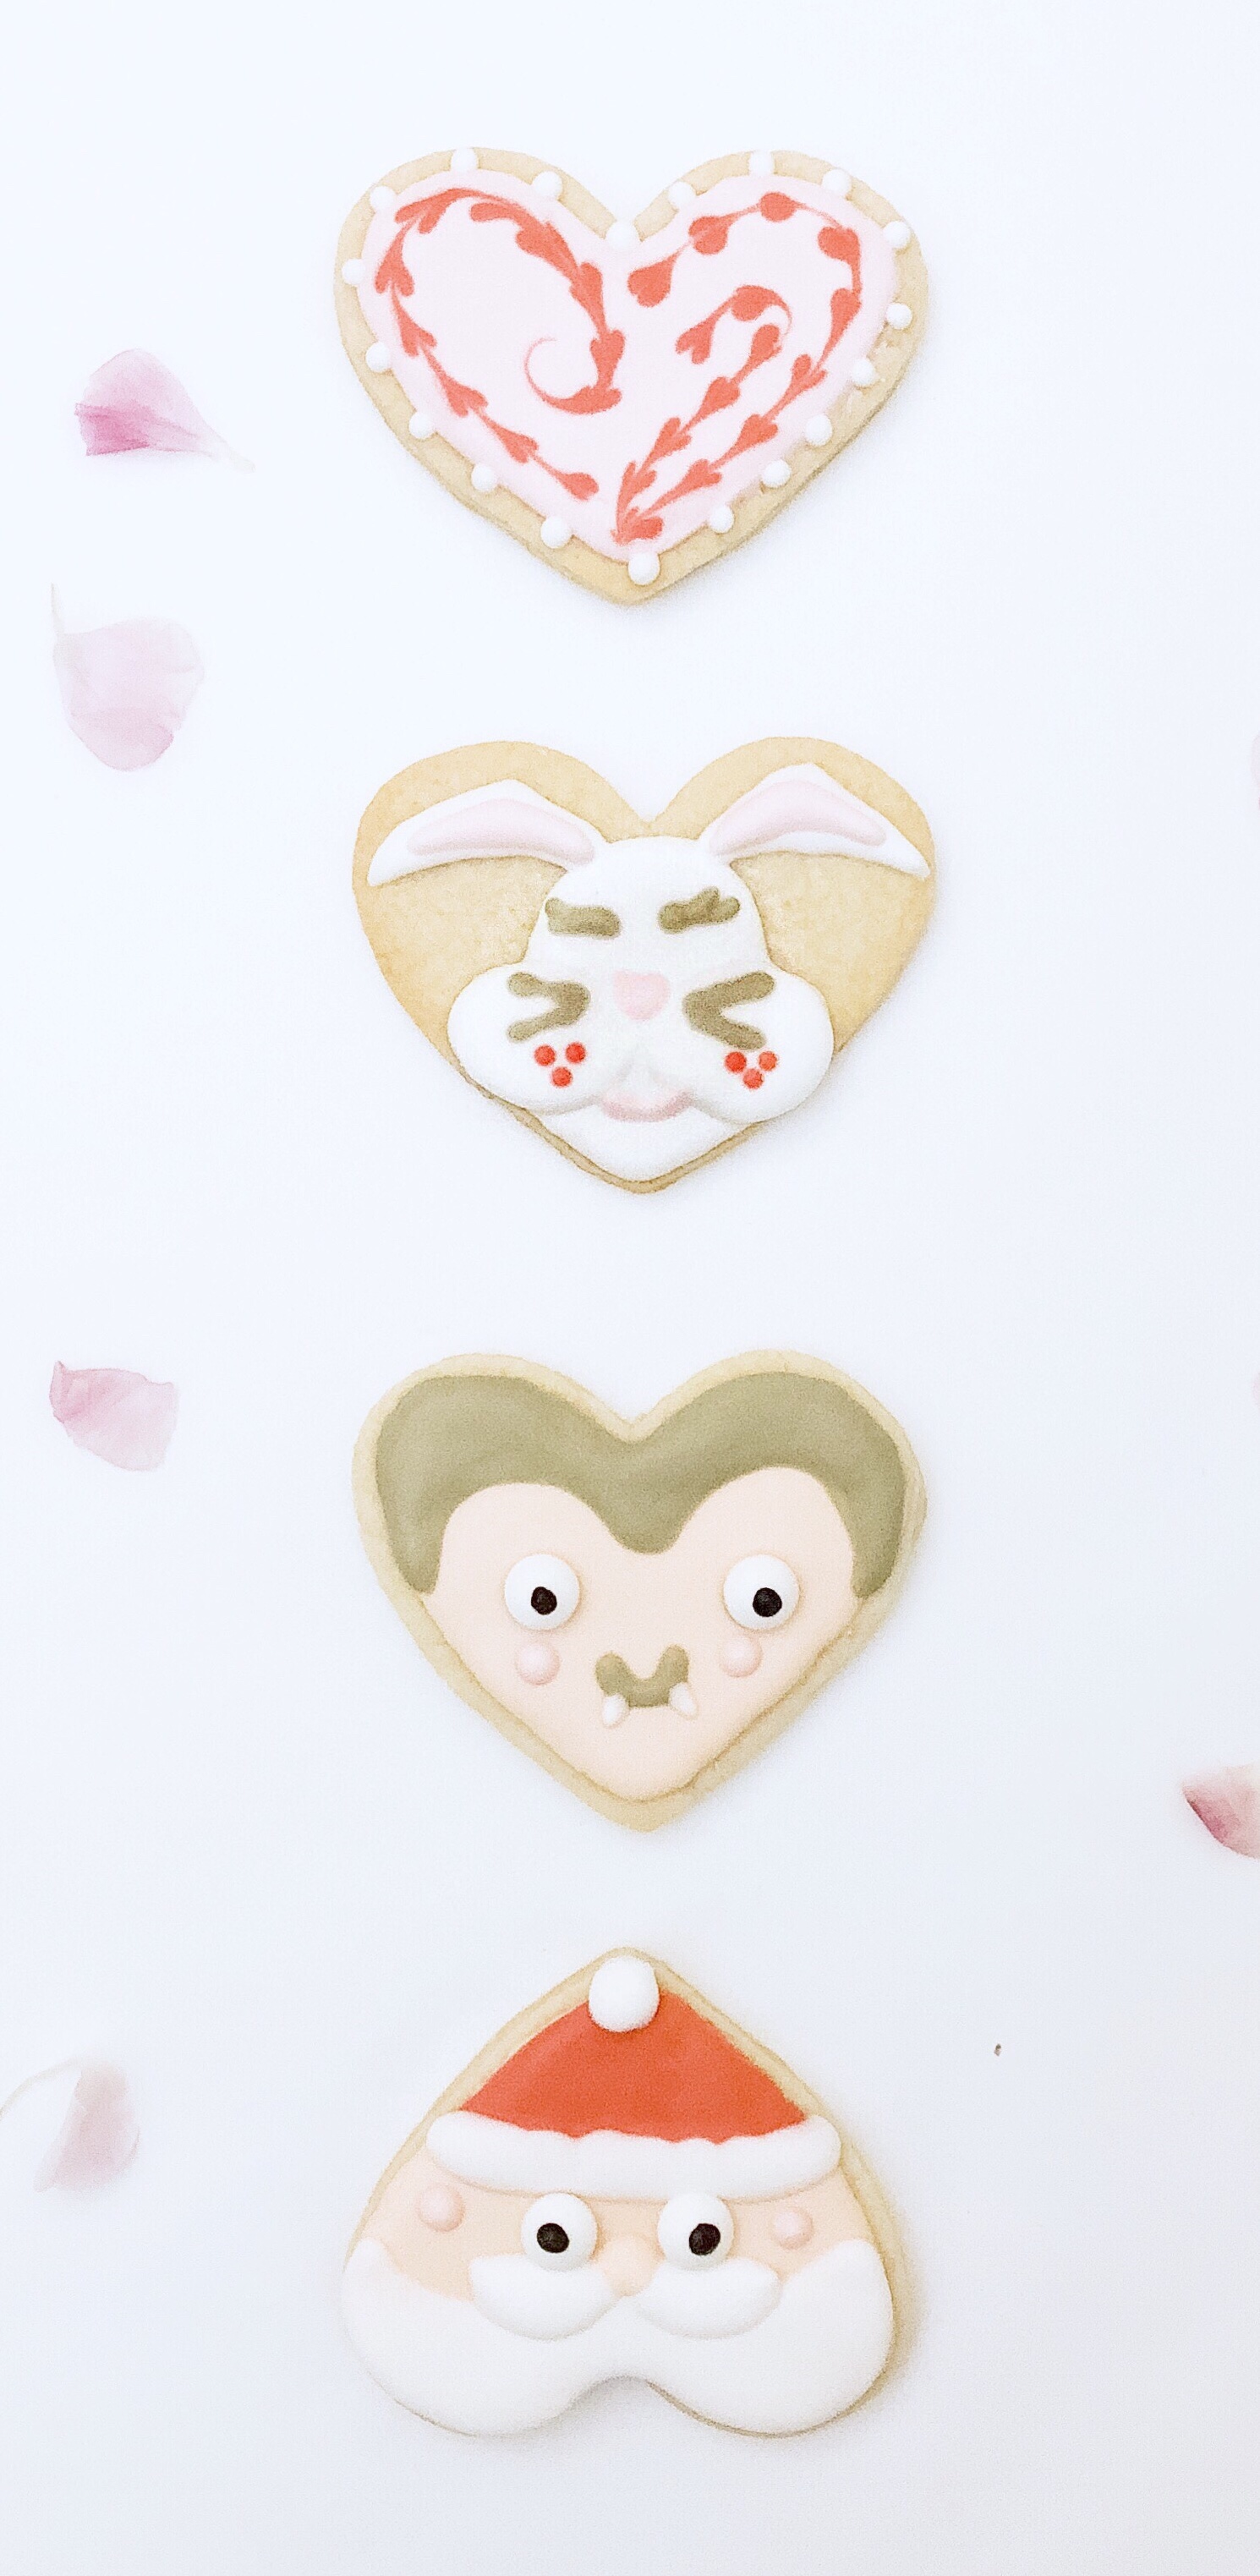
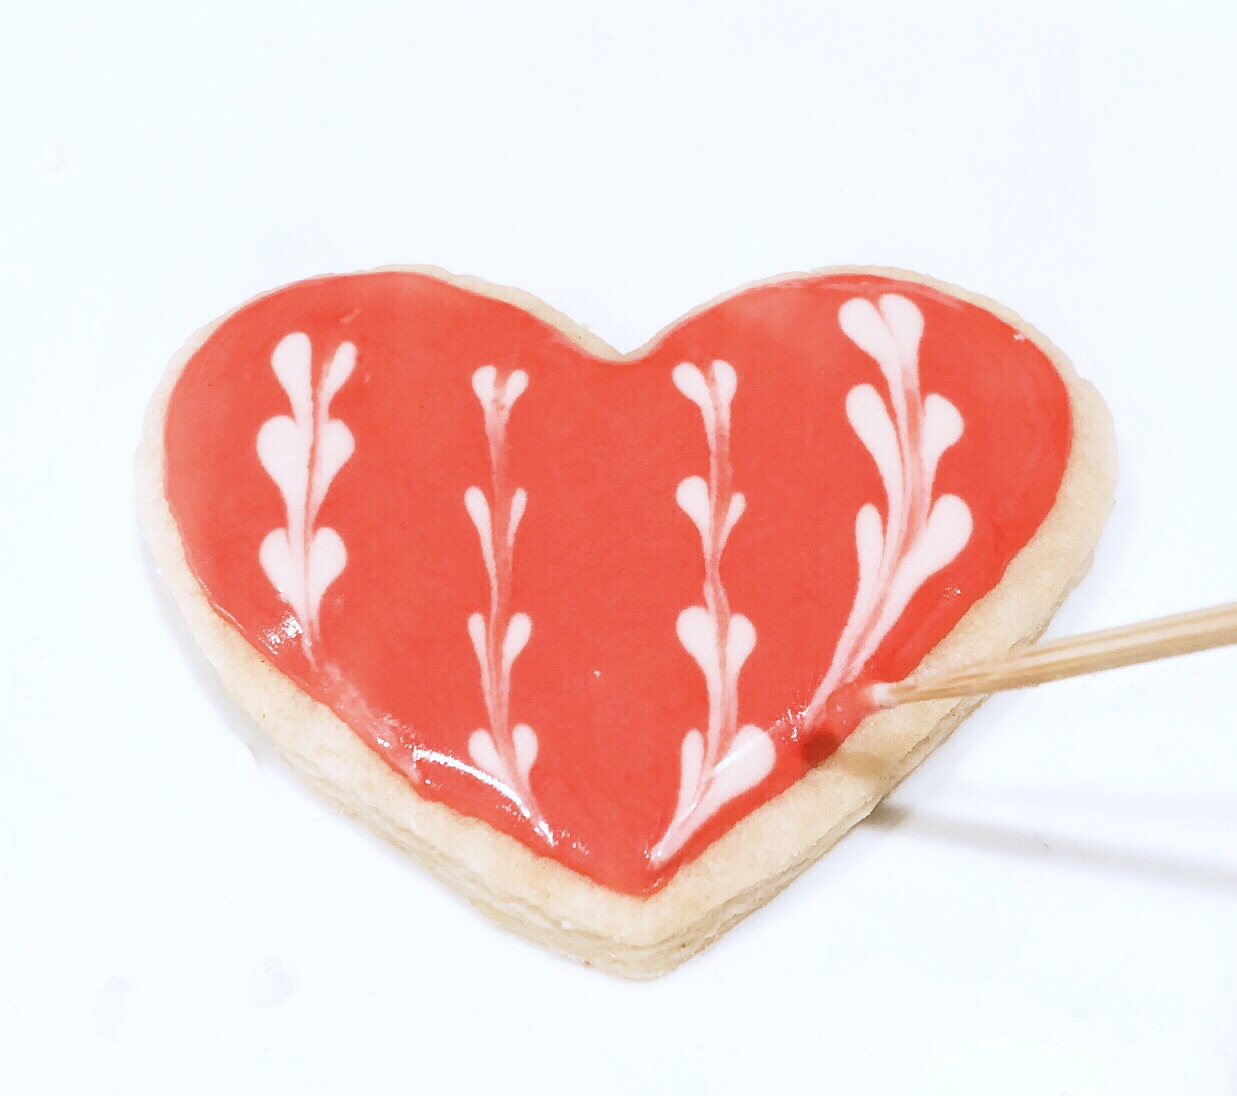
For the Valentine’s Day heart, I lined and filled it with the pink icing. You can use a toothpick or bamboo skewer to help you fill in gaps. Then I made dots around the edge and used a skewer to draw a line through the dots to form the hearts. This is a different cookie design but similar idea.
For the Easter cookie, draw and fill in the outline of the bunny. Let the icing harden slightly and then fill in the bunny’s features.
To make the Halloween and Christmas cookies, outline and fill in the cookies with the tan icing. Let it harden slightly and then go back and fill in the facial features.
I love it when you can find more than one use for a kitchen tool! It saves kitchen space and allows creativity to work for you!
Hope you try out this recipe and tag me in your photos! @diy_bucket_list