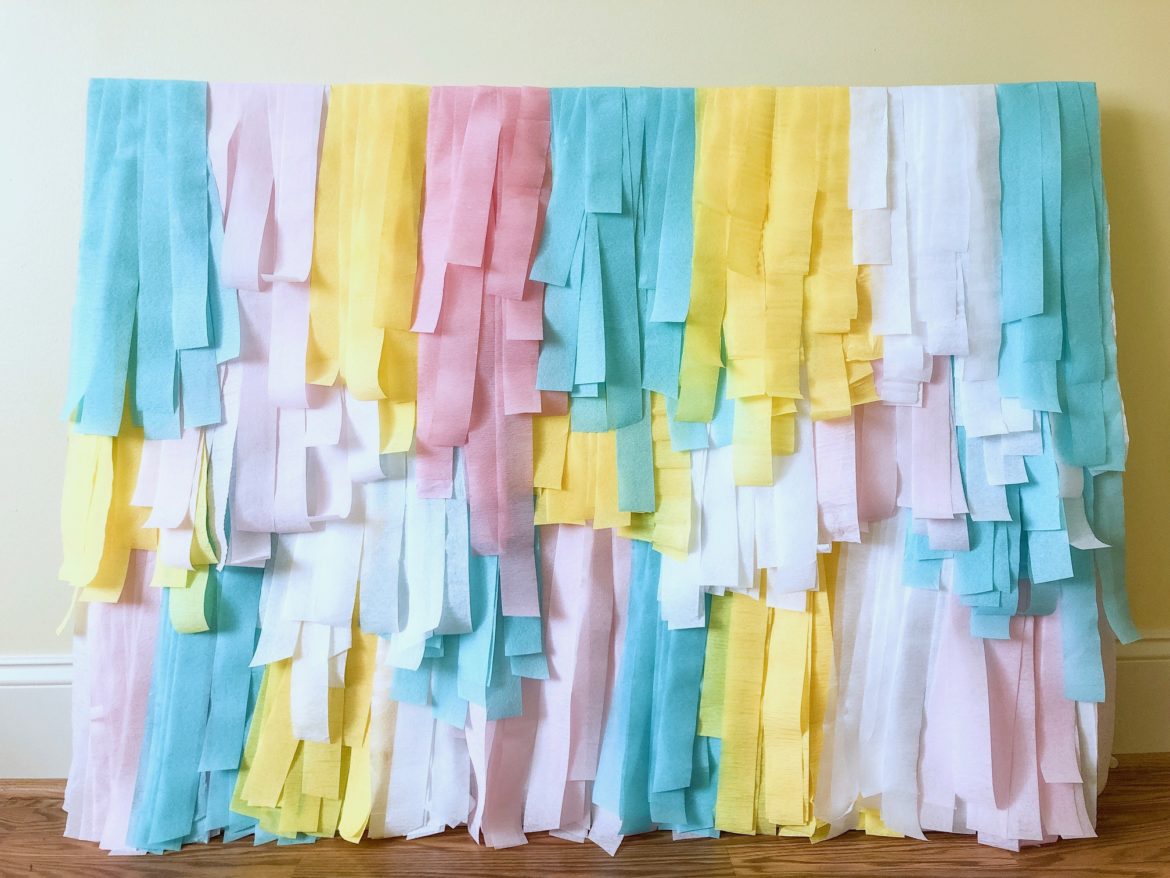
Fringe backdrops add so much fun to any party and I’ve been waiting for the right time to create a DIY table version! My son and niece both have birthdays in April and we figured the same people would be invited if we had separate parties so we did our guests a favor. Lol! We decided on a Paw Patrol theme since both kids love the show. It was tricky, but I tried to pick colors that would work for both genders and went with pastel colors. It turned out alright and made the dessert table extra special for the kids! The best part of this tutorial is that you only need six items to put this fringe backdrop together.
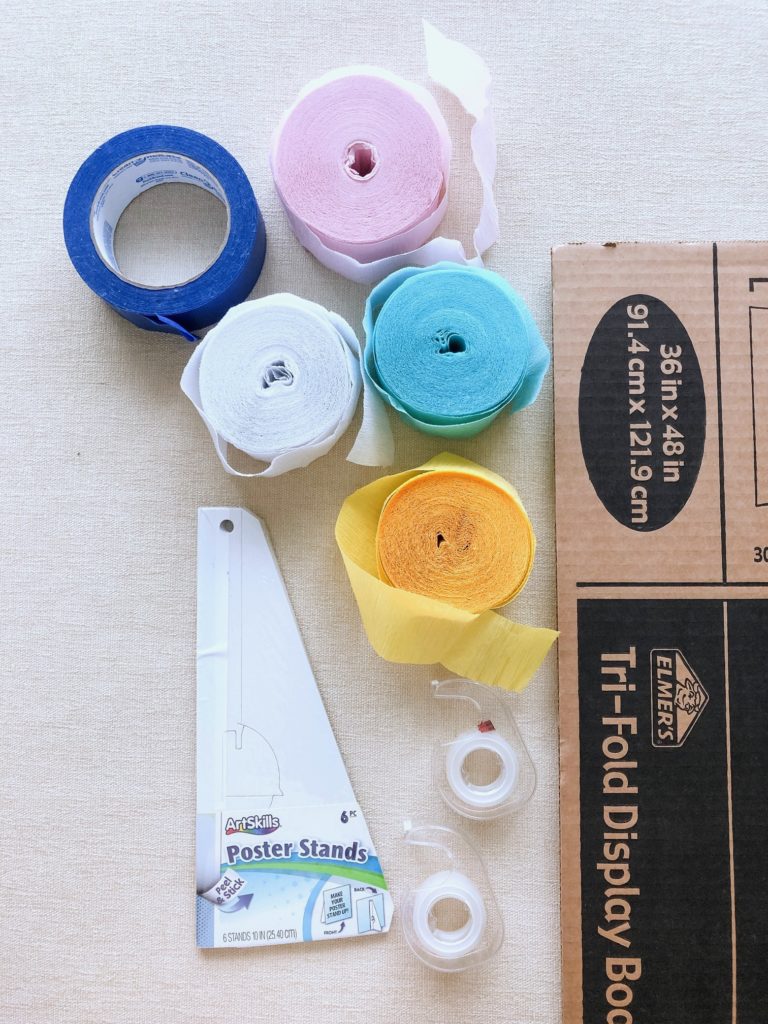
Materials
1 Trifold Display
4 Poster Stands (Amazon or Staples)
Variety of colorful streamers
Painters tape or packing tape
Clear Tape
Scissors
Directions
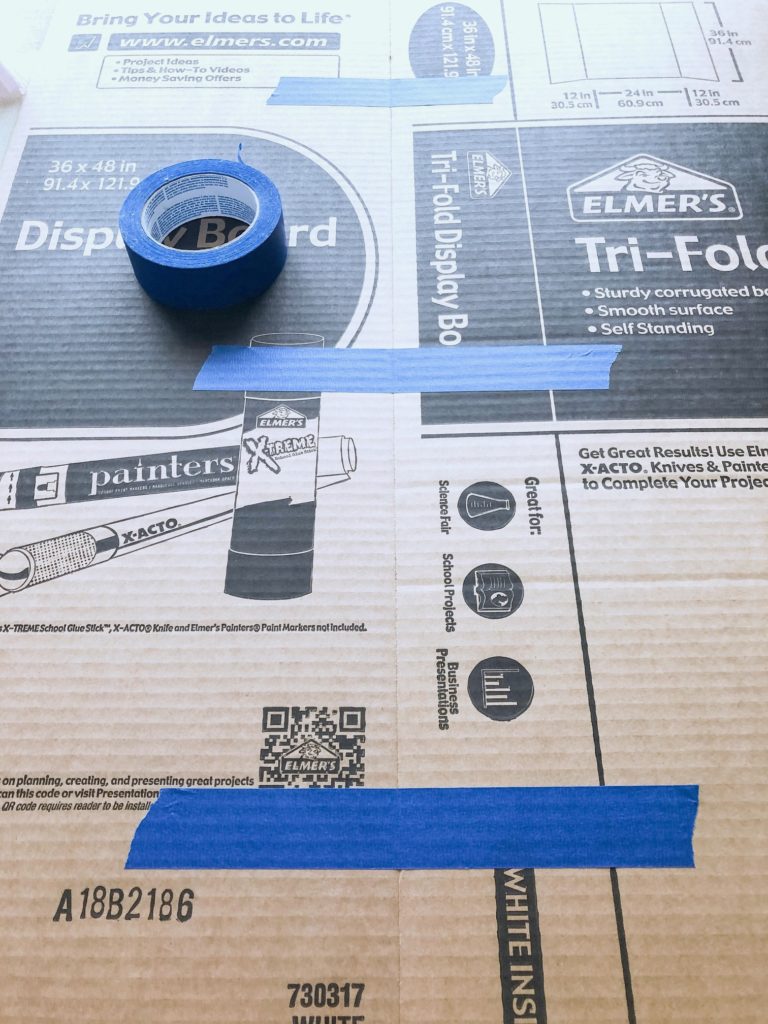
Start by laying the trifold flat on the white side with the brown backside up. Then stick three pieces of painters tape/packing tape across the fold lines on each end of the board. This helps to keep the board from folding in.
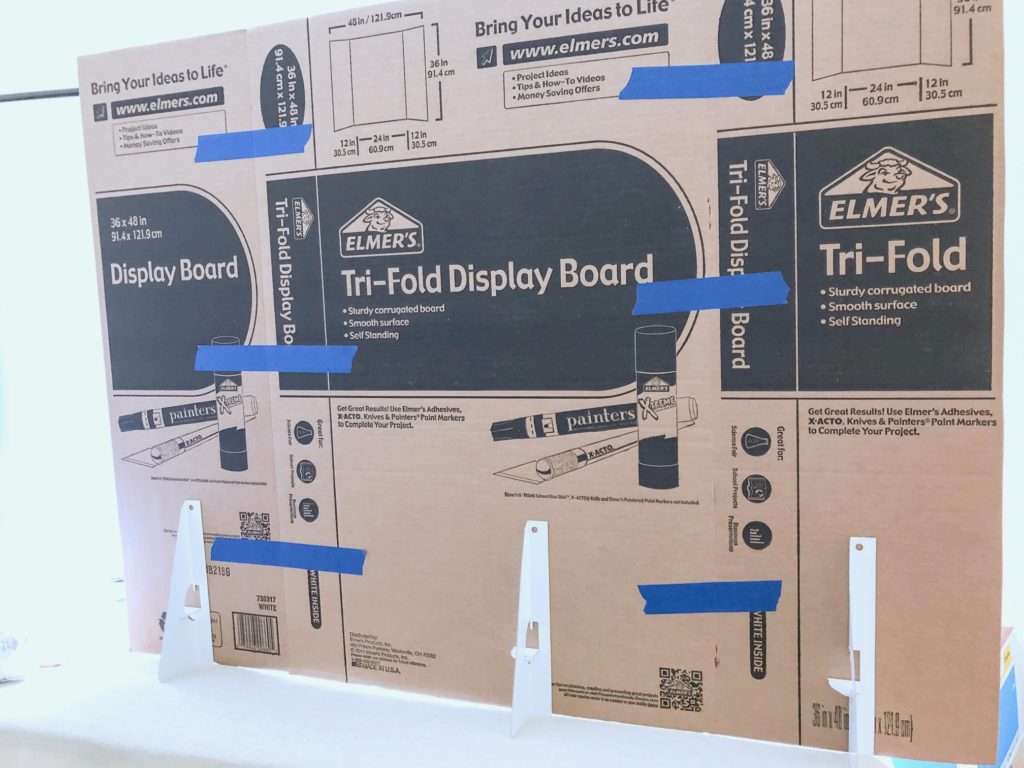
Take the 4 poster stands and stick them along the bottom edge of the board. You can use hot glue to attach them if you want them to stick on better. Make sure they are all flush with the edge of the board or it won’t stand properly. You can skip this step if your dessert table is against a wall and you want to tape it to the wall instead.
I only used three poster stands but four would make the board sturdier. You should end up with something like this:
Keep the poster stands flat and flip the board over so the white side is up. Then take a streamer roll and loop it around your hand until you have several strands. I made my loops hang about 16-18 inches long from the top of my hand. You don’t have to be exact with this since it looks best to have varying lengths. Then tape the top of the strands towards the bottom of the board. You may have to spread out the strands as you tape them on the board.
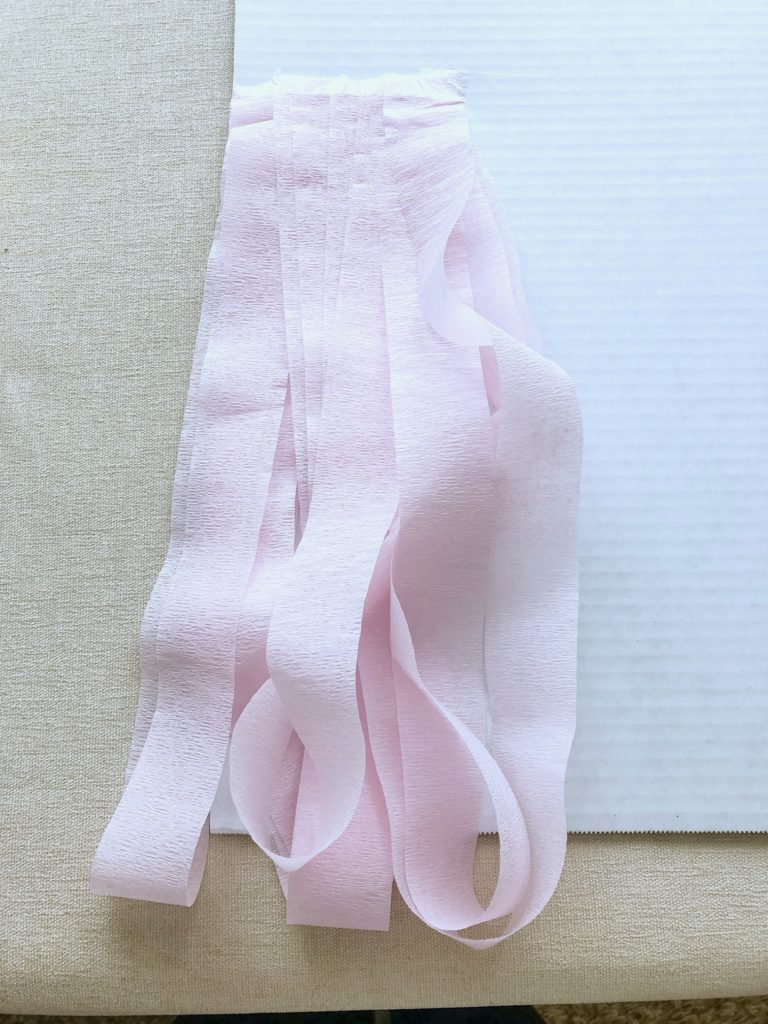
Use scissors to cut the looped ends to form your fringe. You can trim the ends if they are longer than the board like mine were.
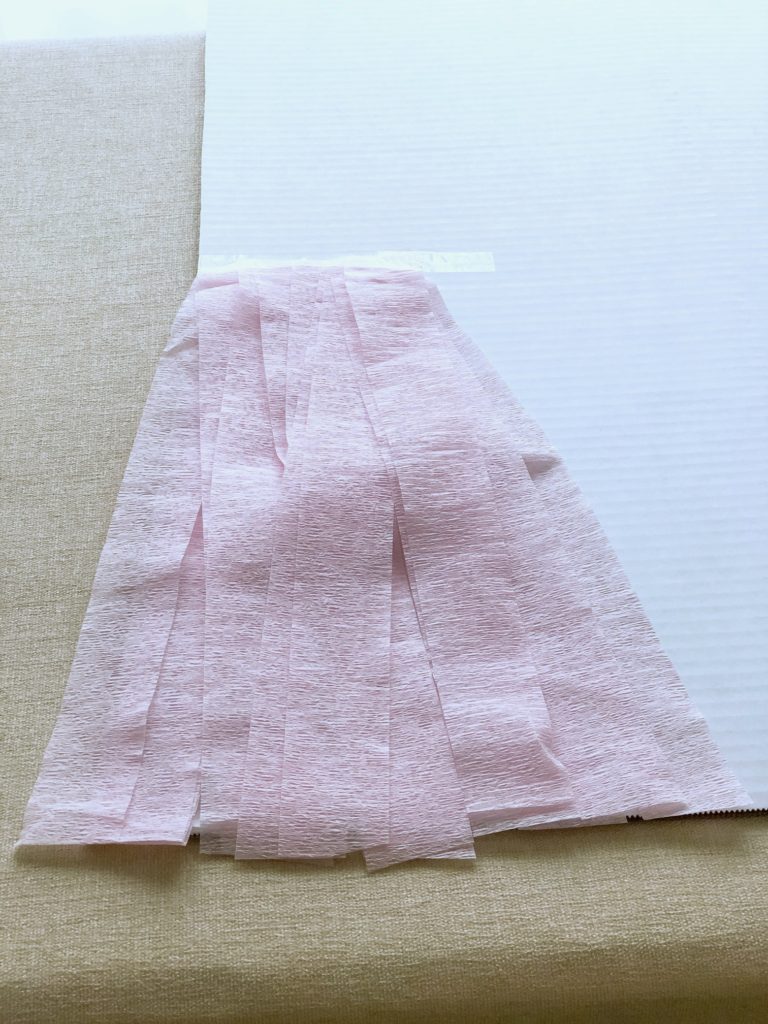
Continue to alternate streamer colors and tape them along the length of the board. You can make each color different lengths to add more texture. It should look something like this:
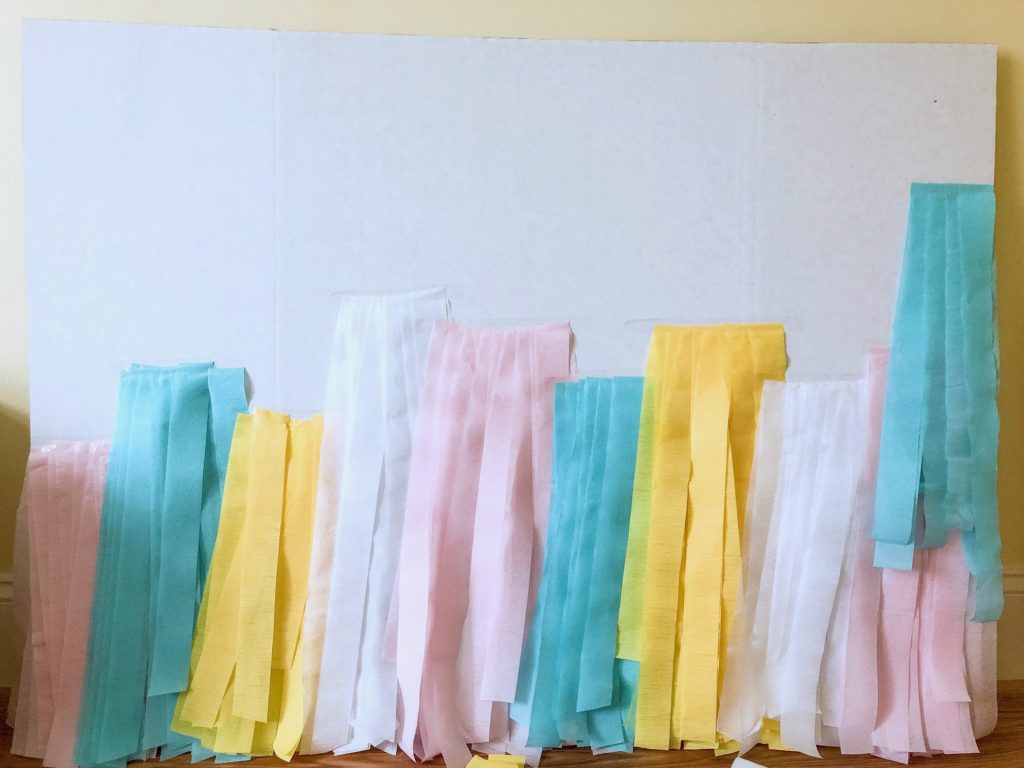
I ended up using three layered rows to fill up this board. I taped the very top layer behind the back of the board to give a more finished look. That’s all there is to this fun DIY fringe backdrop for your next amazing party! I would love to see how yours turn out! Please tag me on Instagram if you give this a try! @diy_bucket_list
